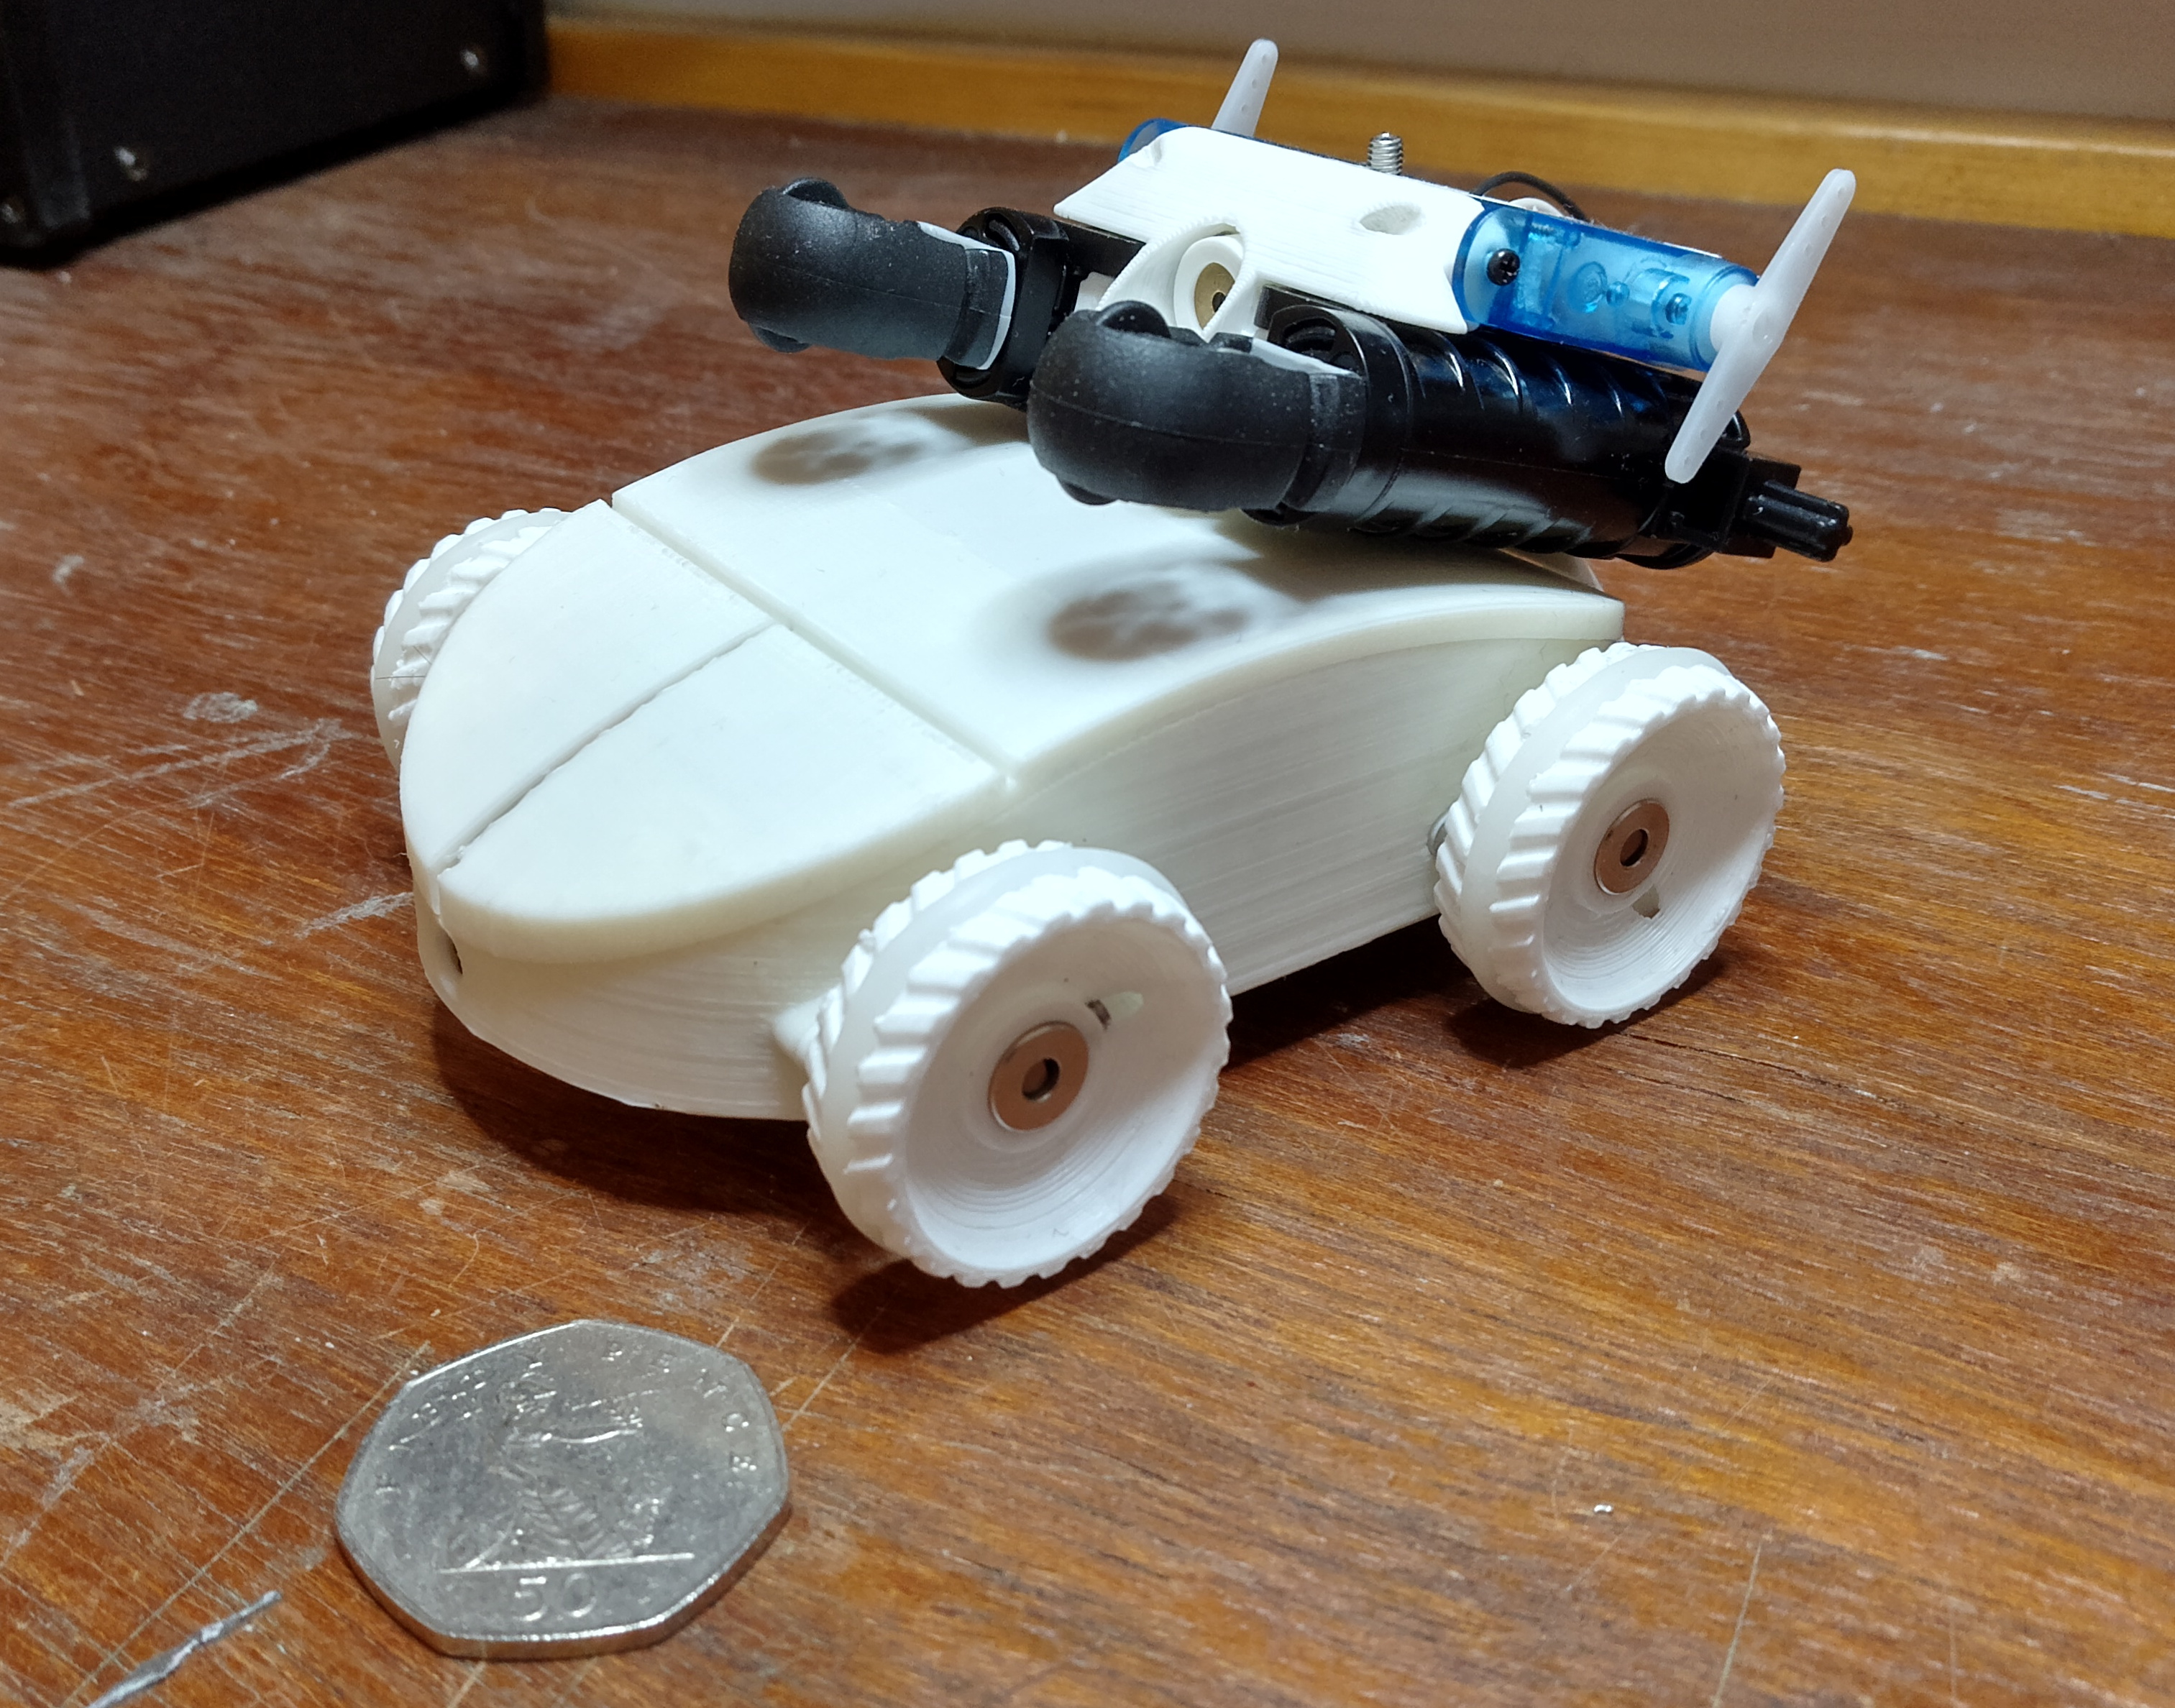
Mini Mouse's Armament
Now, irrespective of personal views on arming robots, unfortunately one of the Pi Wars challenges requires1 that we weaponise them. For Space Invaders we have to be able to knock down as many targets as we can (up to 5) from 1-1.5 metres away.
Plan A
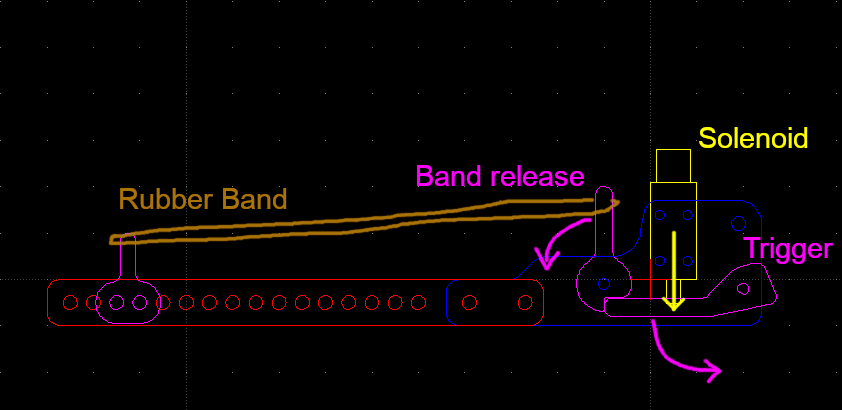
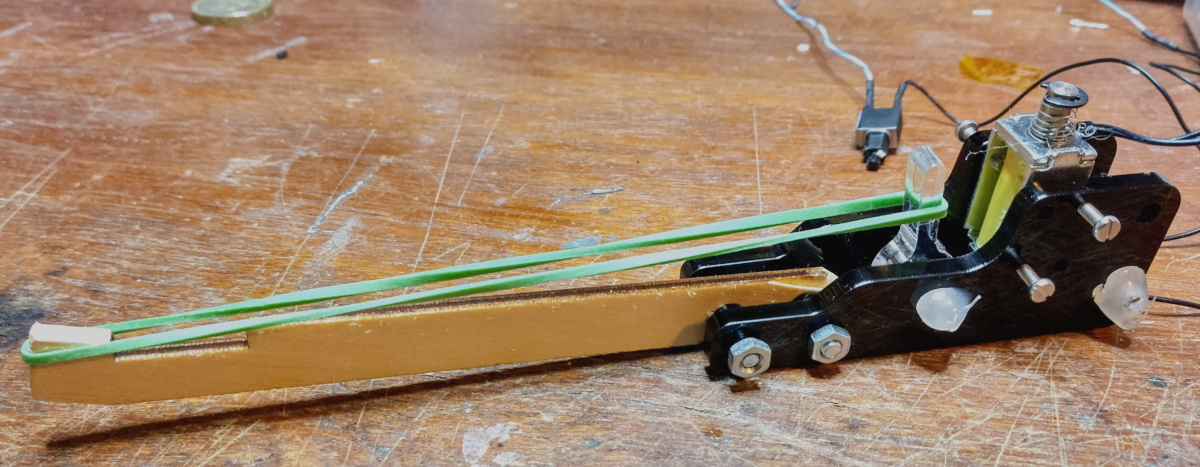
This challenge has caused me a great deal of head scratching as I sought out the right option for projectile launchers for Mini Mouse. For Bot Matrix the plan was dual-wield repeating rubber band guns - so that was my starting point for Mini Mouse too.
It was a relatively simple plan, I bought some little solenoid actuators, with the intention that they’d flick a lever out of the way to release the band.
I threw together a prototype at Robot Club and…. it was entirely underwhelming. The release was unreliable - even directly connected to a 12 V LiPo the actuator lacked the force required to release the mechanism, and when it did release, the rubber band would get caught or fly in a random direction most of the time.
With Plan A scuppered, I spent quite some time agonising over what to do next. I obviously have a requirement to keep things compact, and while a flywheel-based Nerf launcher is 100% the correct tool for the job, I think it’s both uninteresting, and too big.
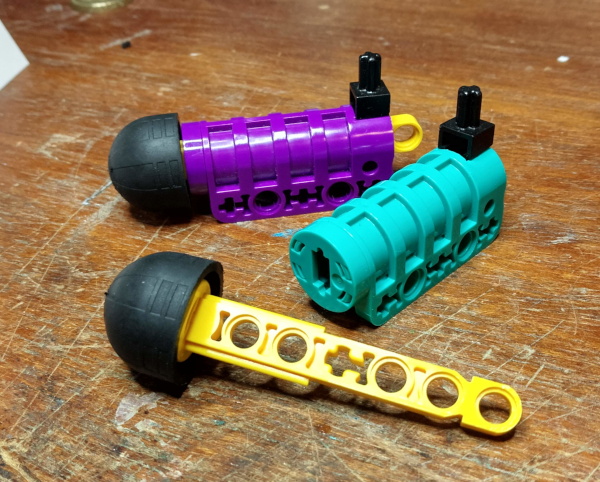
Somewhere along the line it hit me that a LEGO set I had as a child had a pair of super compact dart guns, which probably fit the bill perfectly. They are even aesthetically compatible :-). Enter the LEGO Competition Cannon.
I dug my originals out of my parents' loft at Christmas and confirmed that they’d just about do the job, in terms of firepower. Then, on eBay, I found a matching pair of black launchers and bough a set of slightly lighter-weight darts to try and get better range.
Gun Mount
Immediately after Christmas, I bought myself a Creality Ender 3 3D printer, and after printing a set of wheels for the final chassis, I kept it busy on a few iterations of my launcher.
I have no idea how it exists, but you can download STL files of a huge array of LEGO parts from printabrick.org, and I used their model of a competition cannon to build my mount around.
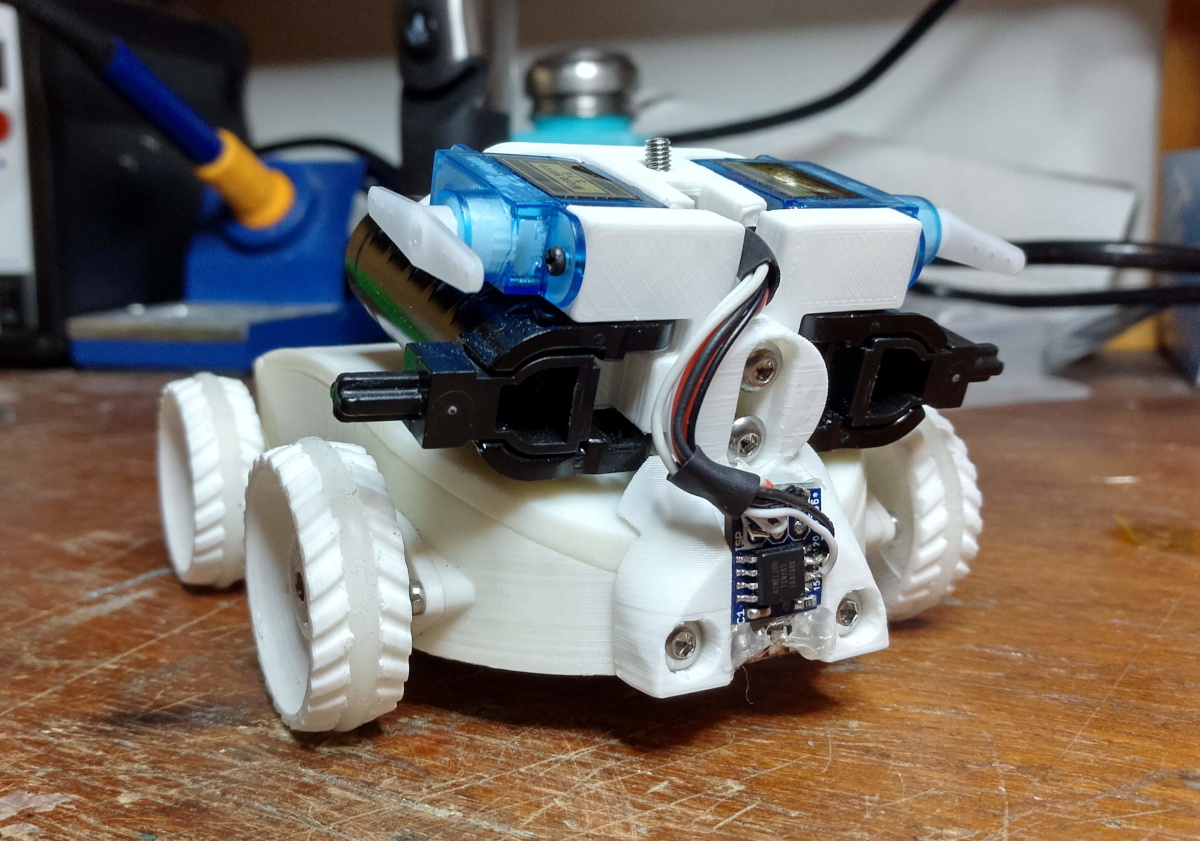
I bought some super tiny 3.7 g servos to pull the trigger, and built a simple testing mount to prove it out (I love rapid prototyping):
Satisfied that the concept was sound, I set to the final thing. Aiming is important, so the gun mount incorporates an adjustable (via bolts) tilt, and a laser pointer with grub-screw alignment adjustment. The idea is to zero the cannons and laser for convergence at around 1.5 metres.
Pleased with how well the printer had been working, and encouraged by the Discord, I tried fully embedding some nuts in my design. The model has voids which are sized to accept an M3 nut, and via Cura you can ask for the print to pause at a particular layer (or edit the G-Code by hand). After placing in the nuts, you resume the print, and they become fully enclosed in the part. With a little bit of fiddling to make sure Cura didn’t fill the hole with support, it worked out really well.

The final article is in two pieces. The top piece holds the launchers, the servos and the laser. This is the part with the embedded nuts. The LEGO parts are shaped so that they can slide on to a “rail” (I’m not sure what kind of LEGO piece it’s meant to fit), and then I use two M3 bolts each to secure them. Those bolts thread straight into the plastic, as they don’t need to hold any weight or be adjusted frequently.
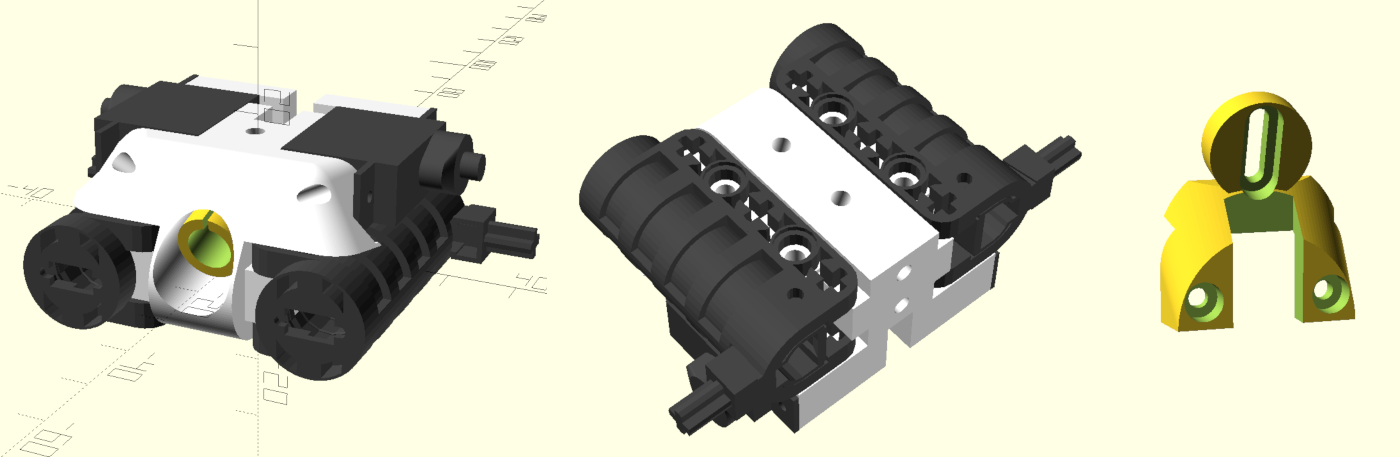
The servos are also screwed straight into the plastic using the small screws they came with. The laser is in a printed “tube”, which is held in place with adjustable grub screws. There’s two at the rear, and three at the front, which allows me to fully adjust where the laser is pointing to make sure it’s accurate.
At the back of the top piece are the two embedded nuts, which accept bolts to attach to the second piece. The top of the second piece has a curved front face, which allows the tilt angle to be adjusted via the tension of the two bolts. This requires torquing the bolts pretty hard - which is why I wanted proper metal nuts to screw into.
At the bottom, this piece bolts into my “Aux port” on the rear of the main chassis, consisting of two M3 bolts and a 4-pin female DuPont header. This makes adding/removing the attachment dead simple - just two bolts, and the electronic connector plugs itself in.
Electronics and Software
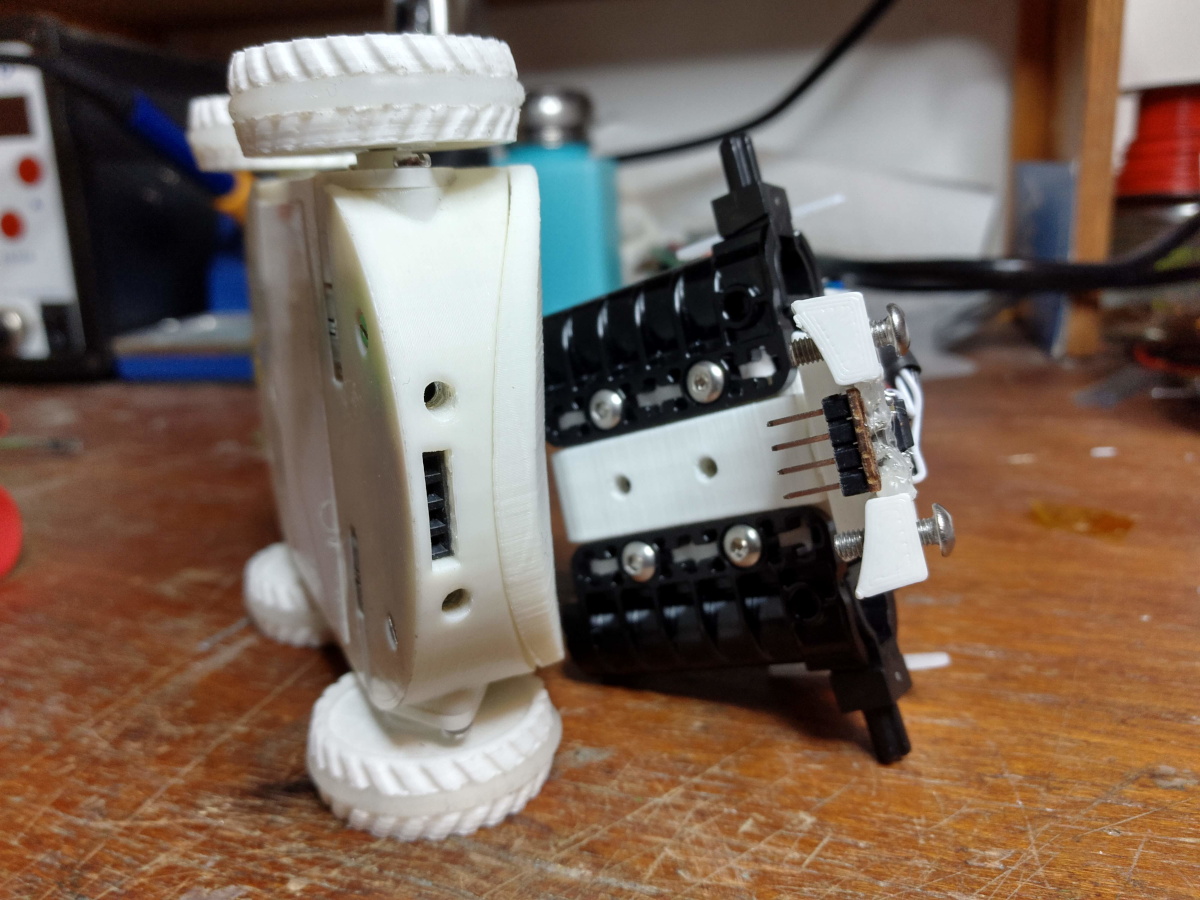
The electronics for the attachment are extremely simple, consisting of just an Attiny85 (overkill). A few years back I made the Picopixel, and got around 100 of the tiny little boards (working out around 10p each). This tiny circuit board holds an Attinyx5 and an i2c level shifter circuit. It makes quite a convenient little Attiny breakout for really small things.
Unfortunately, I wanted the pinout on my aux connector on the robot to match a little OLED screen I have, which doesn’t match the pins on the Picopixel. So instead, I cut down the Picopixel board to remove the level shifting circuit (this was planned for in the original design), and epoxied the board to a small piece of stripboard to convert the pin arrangement.
The firmware on the Attiny is based on my
usi_i2c_slave library, which is
more than 4 years old but I’ve used in a bunch of different projects. On top of
the i2c slave, I wrote a very simple servo PWM implementation using the
Attiny’s timers.
The i2c slave has a set of registers which let me set the minimum and maximum range for both servos (calibration), their positions, and on/off controls for the two servos and the laser GPIO. The calibration can be stored into EEPROM on the chip, so that it isn’t lost when powered off. The code for the Attiny is here: https://github.com/usedbytes/i2c_servos
On the robot side, the code is really simple - I directly map the two DS4 triggers to servo position, so pulling the triggers moves the servos. The laser is turned on every time the triggers move, and after 10 seconds of inactivity, the servos and laser turn off.
The software on the robot side is theoretically able to cope with the attachment being “hot plugged” while the robot is running - but in reality, the sudden start-up of the servos (unavoidable - they twitch as soon as power is applied) seems to brown out the Pi sometimes.
Testing
I will need to reload after two shots, but I have enough darts that I won’t need to retrieve them between salvos - only between rounds. I think that will be easy and slick enough to not cause an issue on the day.
-
Yeah, I know, you can use the balls. But that’s a) no fun, b) more difficult, and c) not competitive ↩︎