Un-replaceable Belling oven switch replacement
Hacking together a replacement for an unobtainable part
One Sunday evening around the end of October, our dinner just wasn’t cooking properly. The cause: despite heating initially, the oven wasn’t holding temperature.
Now this particular cooker - a Belling Platinum db3 - is pretty old. I don’t know exactly how old, but it’s old enough that none of the spare parts suppliers recognise it as a model; and the most similar manual I can find online has a copyright date of 2002, so I assume it’s in the region of 20 years. Under my stewardship (the past 6 years) it’s had the main oven fan replaced, and two main oven element replacements, so it’s fair to say that it’s rather living on borrowed time.
I assumed that the element had gone again, and turned off the power, then set about dismantling that section (a familiar process), but found the element showed a “reasonable” impedance on my multimeter. Carefully taping the probes to the element’s supply leads and turning on the power, there were precisely zero volts reaching the element, so this time we’re into uncharted territory.
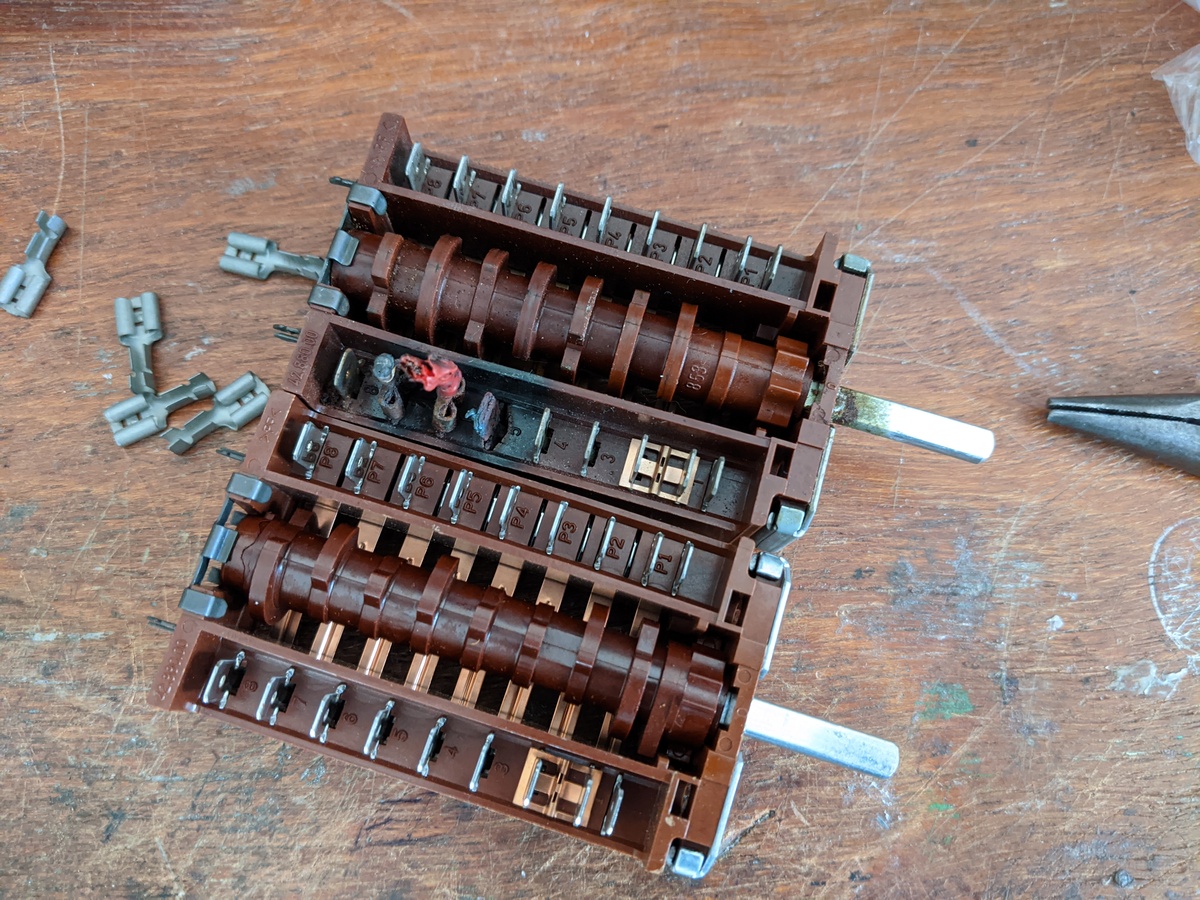
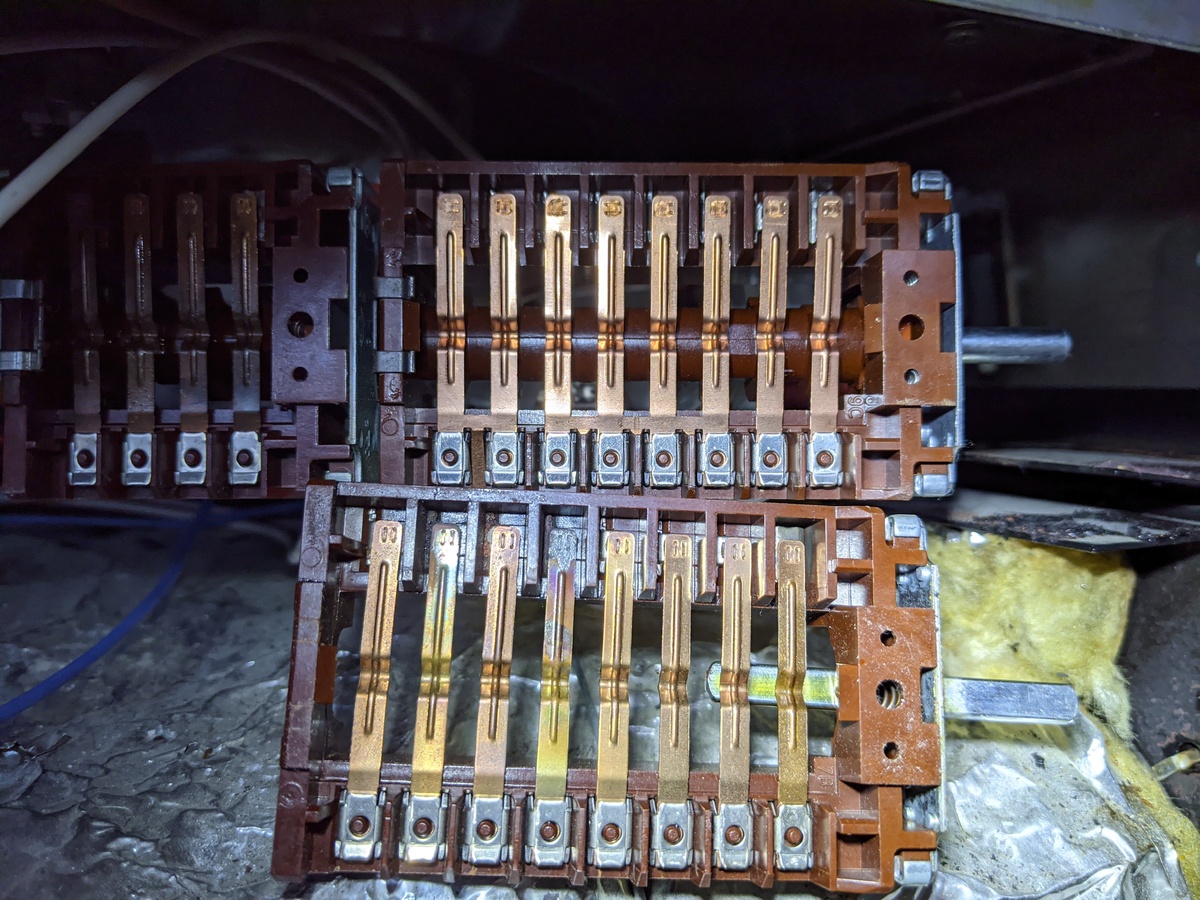
To cut an already long story short, I thought: “it’s literally mechanical switches and wires, how complicated can it be?", and after an evening of removing progressively more screws and more panels of the appliance, I eventually found myself greeted with the horror show below:
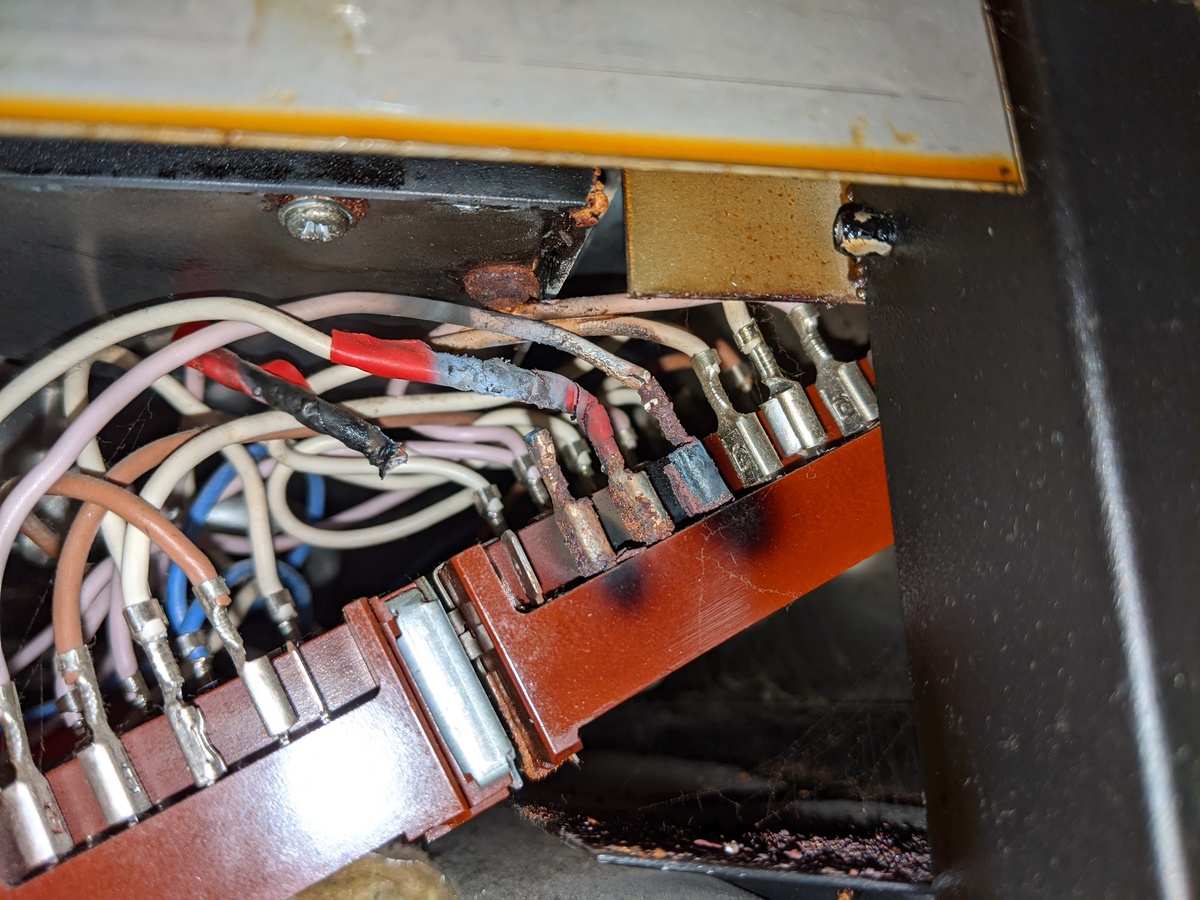
Coroner’s report: Water ingress ⇨ Corrosion ⇨ High resistance ⇨ Extreme resistive heating, accelerated corrosion, probable fire.
Furthermore, judging from the electrical tape, someone already knew about this problem, wrapped the exposed bits of rotting copper with some PVC tape and figured that’d do fine. Borrowed time indeed.
This is an 8-pole single throw rotary switch1, with the poles following a specific pattern to provide all the different functions of the oven: fan + main heater, fan only, half grill, full grill, etc. There’s a second, smaller, 6 pole switch attached to the back of it, but it’s a separate piece which just pushes on to some catches at the back - you can stack these things together infinitely, it seems.
The part number stamped into the front of the broken one is 42.088000.003,
and it’s always fun when Google says:
Your search - 42.08800.003 - did not match any documents.
And the manufacturer responds to your enquiry with2:
Unfortunately, on this occasion we were unable to find the item you require. Even though we haven’t been able to supply on this occasion, we will continue to attempt to source the item. If successful we will add it to our range for your future requirements.
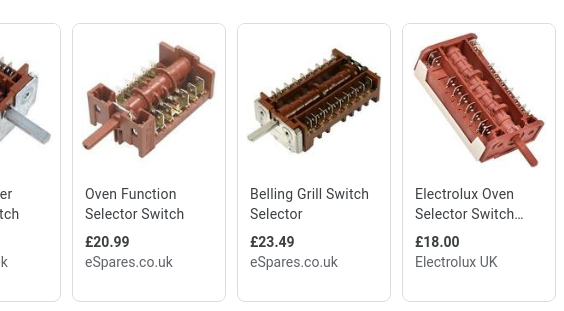
However, trawling through the spare parts sites, there are plenty of similar-looking items:
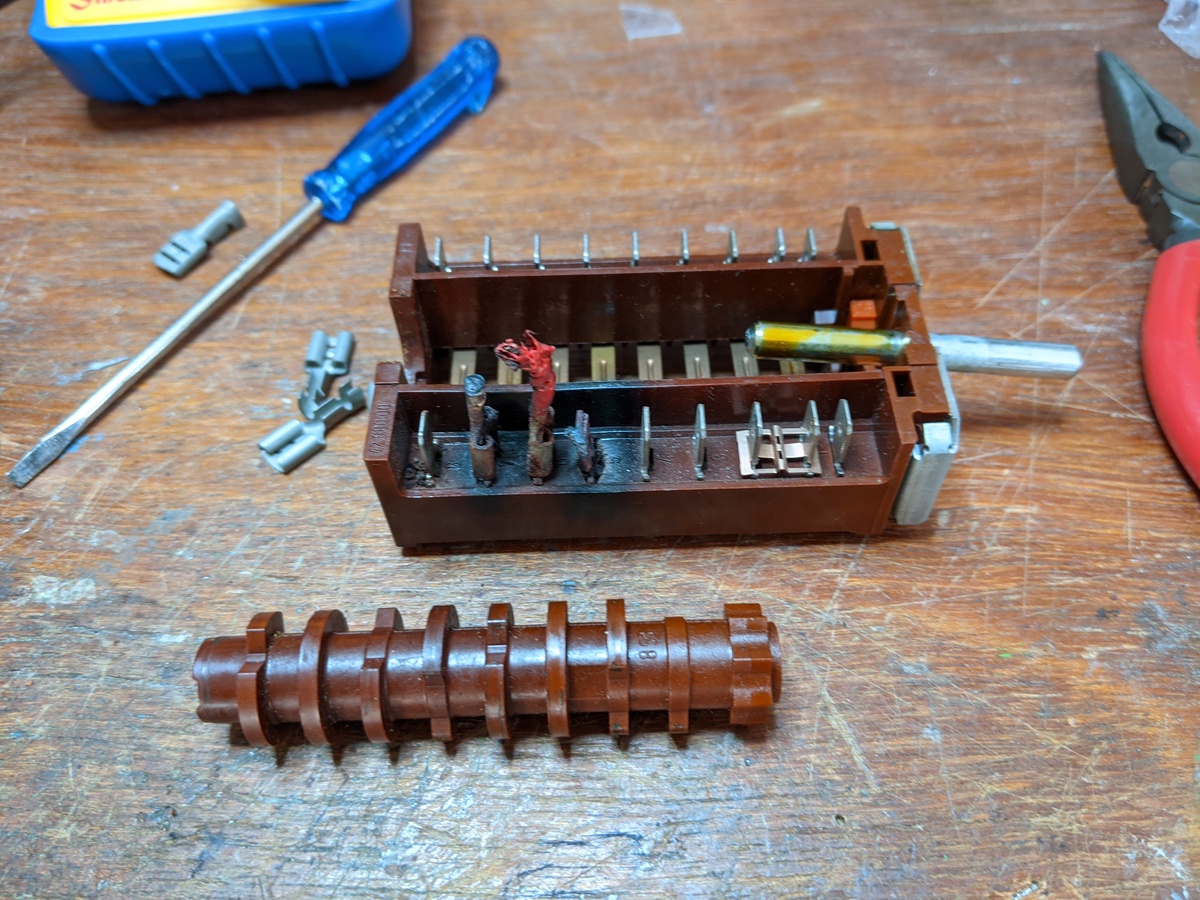
I carefully labelled all the wires, disconnected, and pulled the switch out for a closer look. The way it works is somewhat like a music box - the central cylinder has lumps on it, which open and close the switch leaves. The shape and position of the lumps cause the individual switch poles to open and close in different combinations for each position.
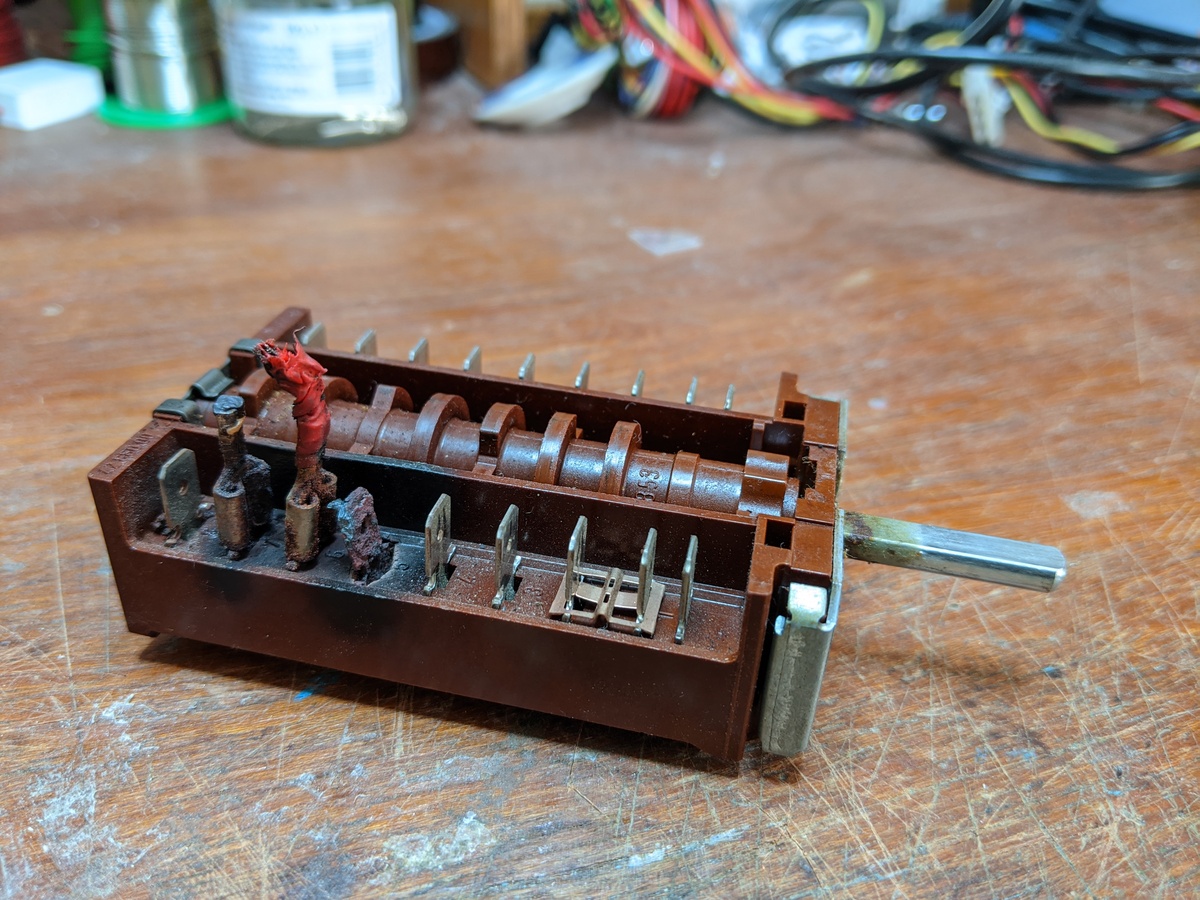
It looked to me that if I could find a similar switch with the same number of poles, then I should be able to swap out the central core and end up with something functionally equivalent to what I needed.
So, I paged through spares sites, and picked the one that looked the most similar to mine. It’s got 8 poles, 9 terminals on each side, and the same little copper bridging piece that mine has between the first two poles - so looked like a good fit, and for £20 it was worth a shot.
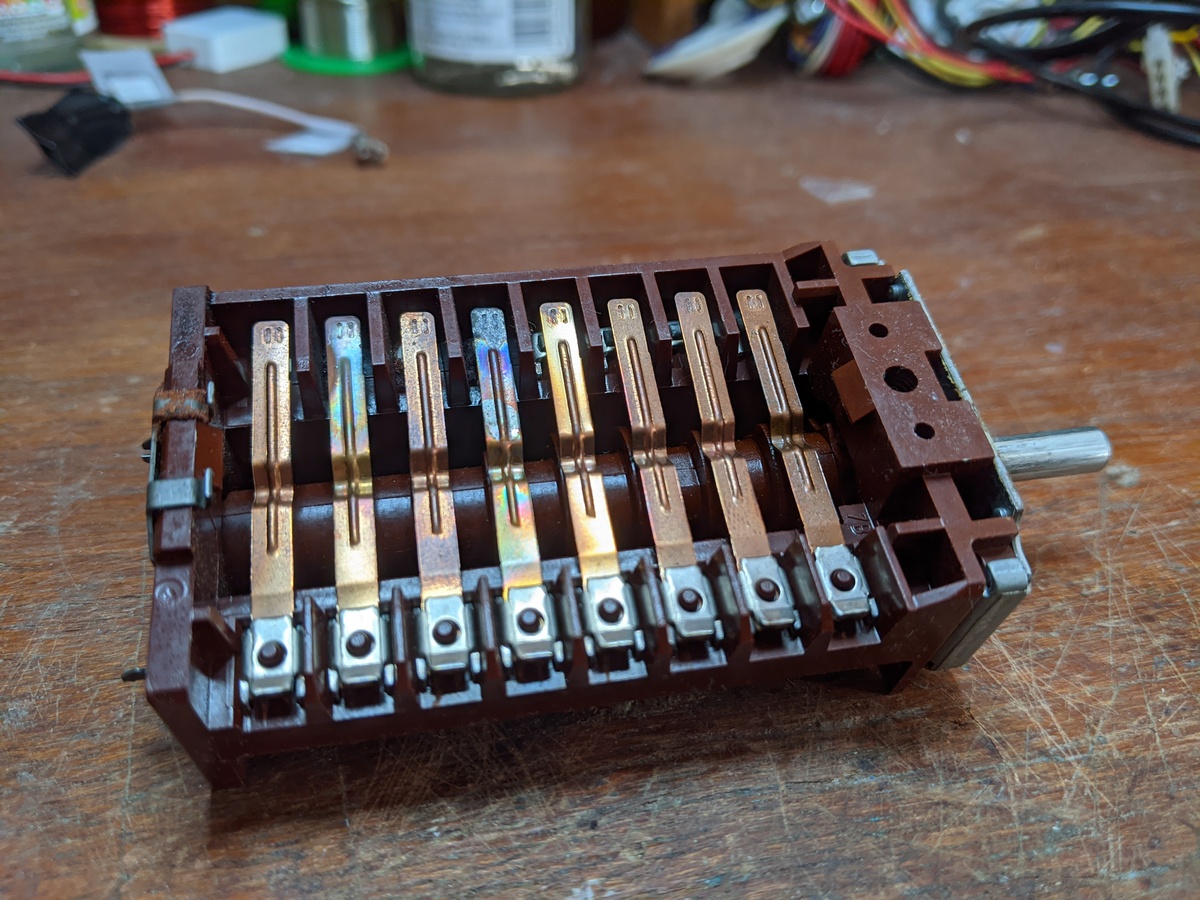
To get the core out, you just pop off the rear metal retaining piece by lifting the tabs on the underside. There’s some decent spring in it, so you need to be careful not to get hit in the face. I’m now 100% convinced that this is exactly how these things are manufactured - the cores are placed in at the last stage as a kind of “specialisation”, with the rest of the body being shared between several part numbers.
The core isn’t held on to the shaft by anything (it even looks lubricated), and slides off quite easily, but you need to wiggle it around a bit to get the “lumps” past the casing.
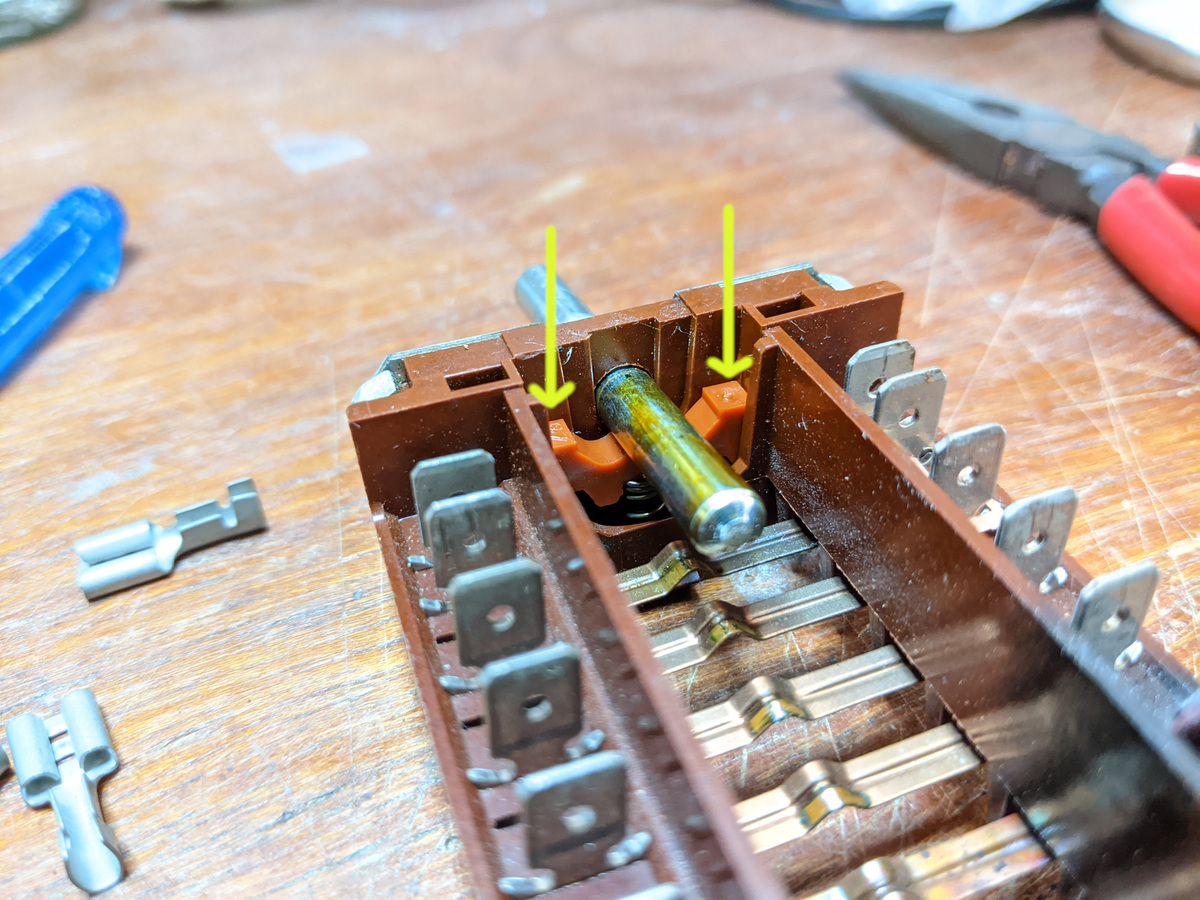
It took all of 5 minutes to swap the core over. The only slightly tricky thing was getting the spring-loaded ratchet-clicky-thing at the front under the new core, but you can push it down from the edges with a pair of fine screwdrivers or tweezers or similar.
I already had some spade terminals of the right size, and some high-temperature silicone insulated wire to replace a damaged piece, so I triple checked the power was still off, fixed up all the wiring, installed the new switch, turned the power on and… the grill was on, permanently, at full power 😞
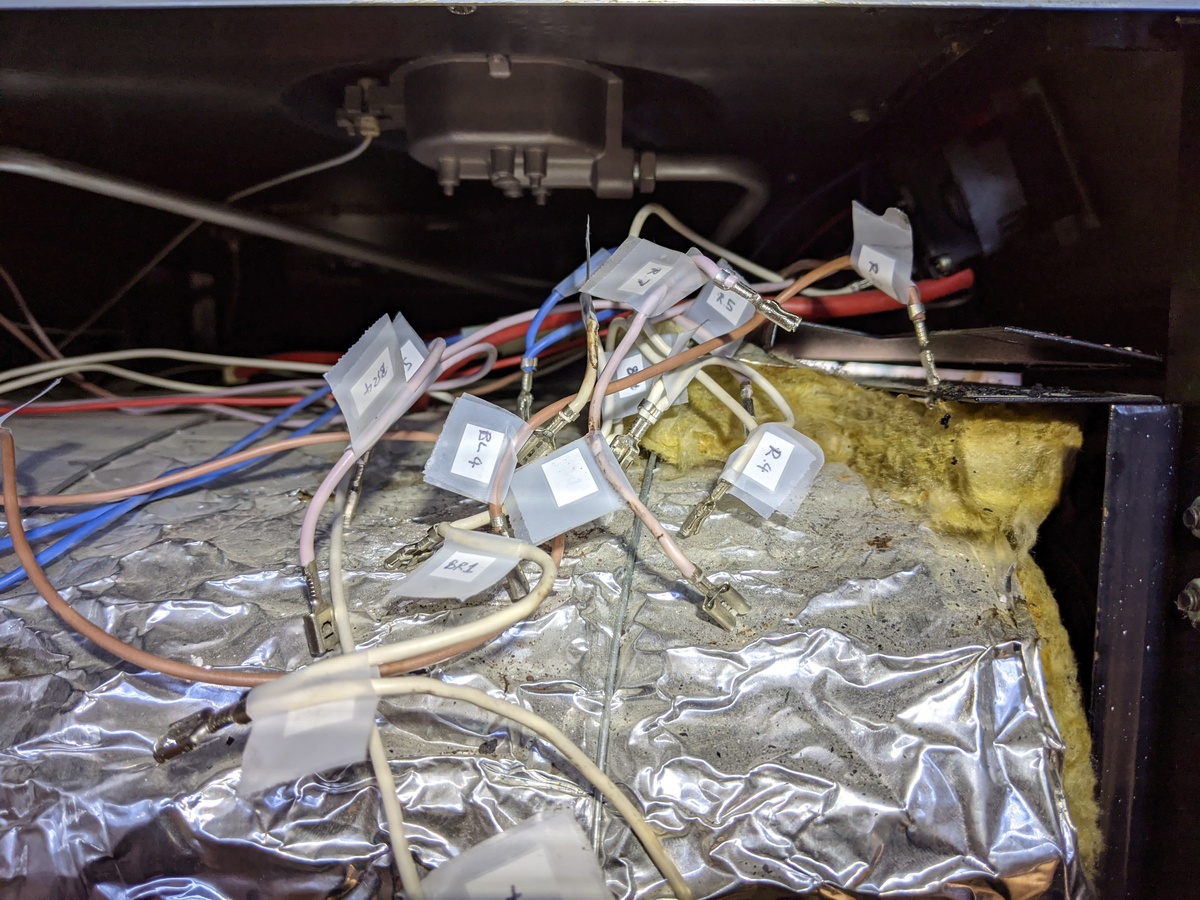
Aside: Before I embarked on this, I was really considering wiring up an Arduino to all of the switch contacts and doing a “boundary scan” type test to check the connections in all positions of the switch. Then, I could easily confirm the replacement was equivalent. Instead, I figured that would take a long time, and the switch is so simple you can see what’s going on, so I just eyeballed the connections from underneath.
Two hours later (according to the photo timestamps), and having further dismantled the cooker to confirm that the thermostat wasn’t broken (it wasn’t), I discovered the problem.
In my defence, it’s not easy to see as the new shiny copper is a similar color to the plastic/resin, but a bunch of contacts on the new switch are directly shorted together, which essentially takes the thermostat out of the circuit and permanently wires mains voltage to the grill.

I removed the switch again (so glad I didn’t take the labels off the wires before confirming everything was working), took a Dremel to the errant bits of copper (no warranty any more…) and re-assembled, this time being rewarded with everything working just fine 😄🎉.
So, if you have one of these switches, and you can’t get a replacement - you may well be able to make a Franken-switch, but look very carefully, and ideally fully check all the poles in all the switch positions are connected as they should be before you put everything back together.
I’m somewhat lucky that the shorted terminals didn’t do anything catastrophic and cause further damage. It’s all mains voltage heater elements and thermostats, so I think it’s unlikely that you’d blow something up - but it would definitely have been a possibility that mains Live and Neutral got shorted together, probably making a big bang, sparks, smoke, maybe fusing the switch, and hopefully tripping the breaker before anything worse happened.
-
At least, I think that’s the right classification. ↩︎
-
to be fair, their “request a part” system was easy to use, and they did get back to me ↩︎