M0o+ Computer Vision
The only computer vision routine on M0o+
To be able to locate the different game pieces in the Pi Wars challenges M0o+ has a very basic camera.
M0o+ is using a Pico for all the processing, so there’s really no chance of porting OpenCV to it. There are other frameworks - even some machine-learning ones like TFLite - which could work on the Pico, however having had success with hand-coding my own routines for Mini Mouse, I decided to do the same this year.
The rules allow us to mark/colour the playing pieces however we want, which makes the problem a bit simpler; and so I’ve implemented just one computer vision routine for M0o+:
Find the red blob
By painting key parts of the challenges pieces red, simply giving the robot the ability to locate a red object in the camera’s field of view should be sufficent.
For Hungry Cattle, the troughs can be red, giving the robot something to drive towards.
For Nature’s Bounty, the base of the tree can be red, helping the robot to align with it.
For Shepherd’s Pi… I haven’t got a strategy for doing that autonomously 😄
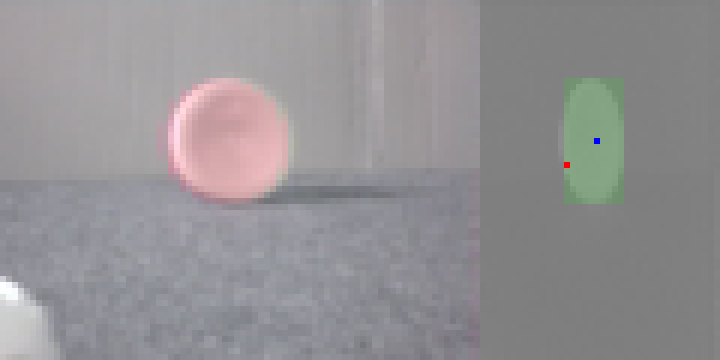
Long ago in the midst of all of my camera troubles, I already got a proof-of-concept working pretty well, with the robot pointing itself towards the reddest thing you hold in front of it:
After an extremely frustrating week of debugging electrical issues, this is intensely satisfying 😌 Everything being done by a @Raspberry_Pi Pico (which is a beast, "find the red blob" takes ~200us) #PiWars pic.twitter.com/njavAfDvp6
— Brian Starkey (@usedbytes) January 23, 2022
The images I’m using are 80x60 pixels, and I’m only using one of the chroma planes, which is subsampled, meaning there’s just 40x60 pixels to process, each being one byte.
The Pico has a very high clock speed (125 MHz), and it manages to run my “find the red blob” function in ~200 microseconds, which is far, far faster than I need!
How it works
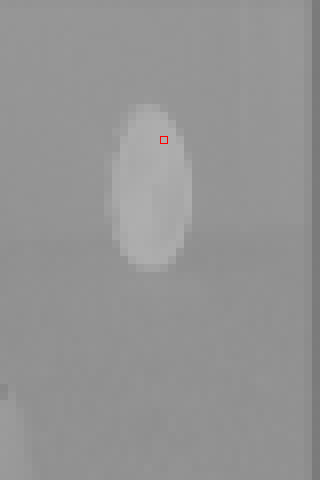
The first step is to find the reddest pixel in the image, everything else will start from there. As I mentioned, I’m using YUV output from the camera, so the “V” or “Cr” part of the image tells me how red things are. The higher the “V” value, the redder the pixel.
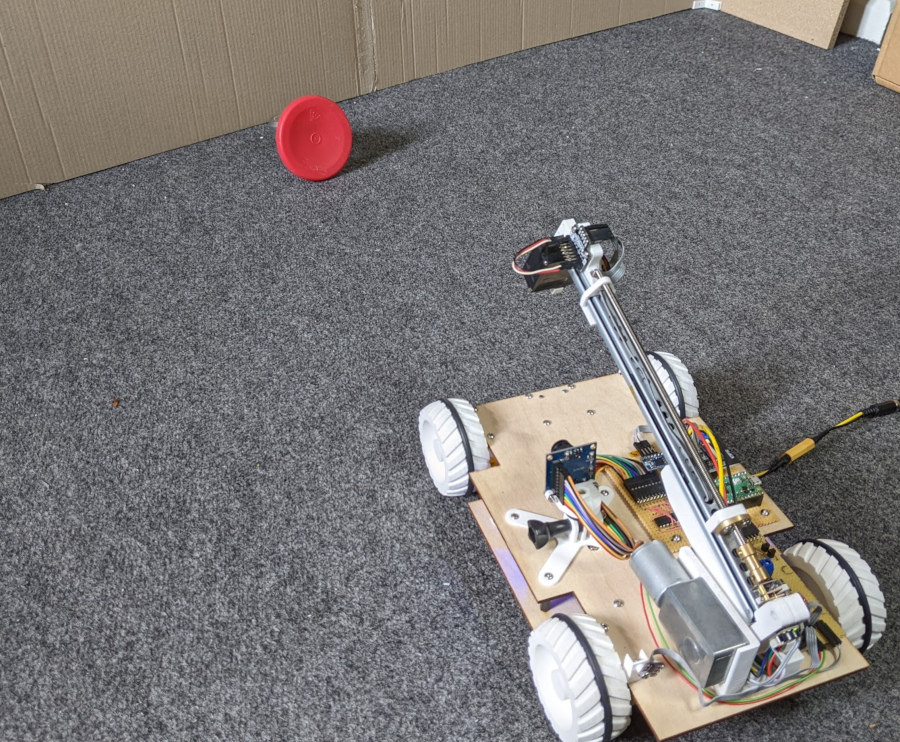
Given the following set-up:
Here’s how the world looks from the robot’s point of view, from left to right showing the RGB, Y, U and V images:
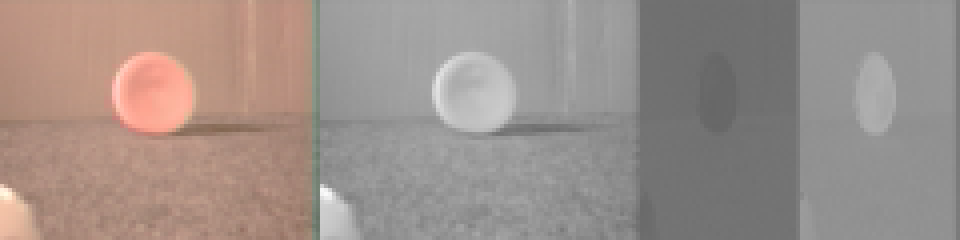
You can see how the red object shows up as a bright region in the “V” image on the right hand side. So the reddest pixel is the one with the brightest “V” value:
// First find the reddest pixel in the image.
// It's a YCbCr image, we only care about "redness", which is Cr
// which is stored in buf->data[2]
for (y = 0; y < buf->height; y++) {
	for (x = 0; x < buf->width / 2; x++) {
		uint8_t pix = buf->data[2][buf->strides[2] * y + x];
		if (pix > reddest) {
			reddest = pix;
			max_x = x;
			max_y = y;
		}
	}
}
The max_x and max_y coordinates will be the starting position for the next
step: Find how much of row max_y is covered by the red object.
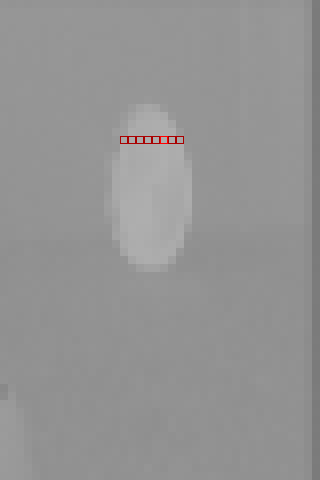
To do that, I work right and left within the row, comparing the pixel value to the “reddest” value. If it’s within some threshold (hard-coded as 10, seems to work OK), then treat it as red.
That gives a left and right coordinate for the edge of the object in this row.
// Search for the furthest left and furthest right pixels in 'row'
// which are brighter than 'maxval - threshold', starting at 'start_idx'
static void search_row(uint8_t *row, int len, int start_idx, uint8_t maxval,
		       int *left_out, int *right_out)
{
	int i;

	int left = start_idx;
	int right = start_idx;

	// Search to the left
	for (i = idx; i >= 0; i--) {
		if (maxval - row[i] <= thresh) {
			left = i;
		} else {
			break;
		}
	}

	// Search to the right
	for (i = idx + 1; i < len; i++) {
		if (maxval - row[i] <= thresh) {
			right = i;
		} else {
			break;
		}
	}

	*left_out = left;
	*right_out = right;
}
A single row might be enough if I only want to know the position of the object side-to-side, but I also want to know where the bottom is, to indicate distance to the object. Also, looking at more rows is likely to be more robust and less likely to get thrown off by minor artifacts in the image.
So, based on the left and right coordinates, I take the middle position, and use that as the starting point in the row above, and repeat.
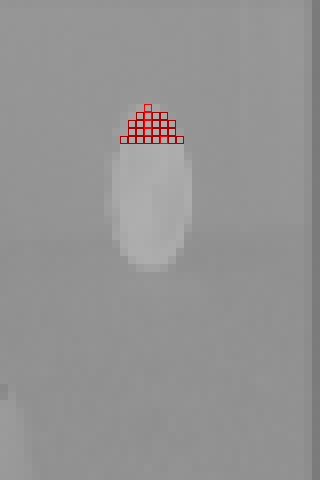
When the starting point in the row above no-longer appears to be red (based on the same threshold as before), I stop, and then work down the rows from the reddest pixel in exactly the same way.
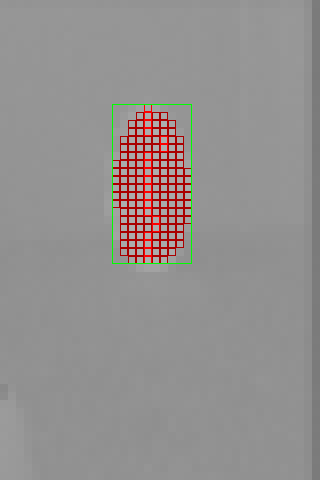
Finally, I take the minimum left and top coordinates, and maximum right and bottom coordinates, and treat that as the bounds of the object.
There’s a gist on github, but it only returns the “middle” of the blob. I didn’t save out the full left/right/top/bottom values until later.
Here’s an animation of the full process:
As I said, on the Pico this is taking ~200 microseconds, and the camera takes something like 50 milliseconds to capture a frame, so the image processing is not going to be the bottleneck.
This approach seems to be robust, even with the fixed threshold value of 10,
and gives me a drop-in find_red_blob(...) function which I can use in all my
challenge planners.